Quick Start
Quick Start
This walkthrough takes you from install to your first result grid.
Step 1: Install DBeagle
Follow the Installation guide if you have not installed the extension yet.
Step 2: Add a connection
- Open the
DBeagleActivity Bar icon. - In the
Connectionsview, clickAdd Connection. - Choose your driver.
- Fill in the connection form.
- Click
Test Connection. - Click
Save and Connectwhen the test succeeds.
| Field | Description |
|---|---|
| Name | A friendly label such as Prod Warehouse or Local Postgres |
| Host | The database hostname |
| Port | The database port for that driver |
| Catalog / Database | The default catalog or database for the session |
| Schema | The default schema when that driver supports one |
| User | The database user name |
| Password | The database password, stored in VS Code SecretStorage |
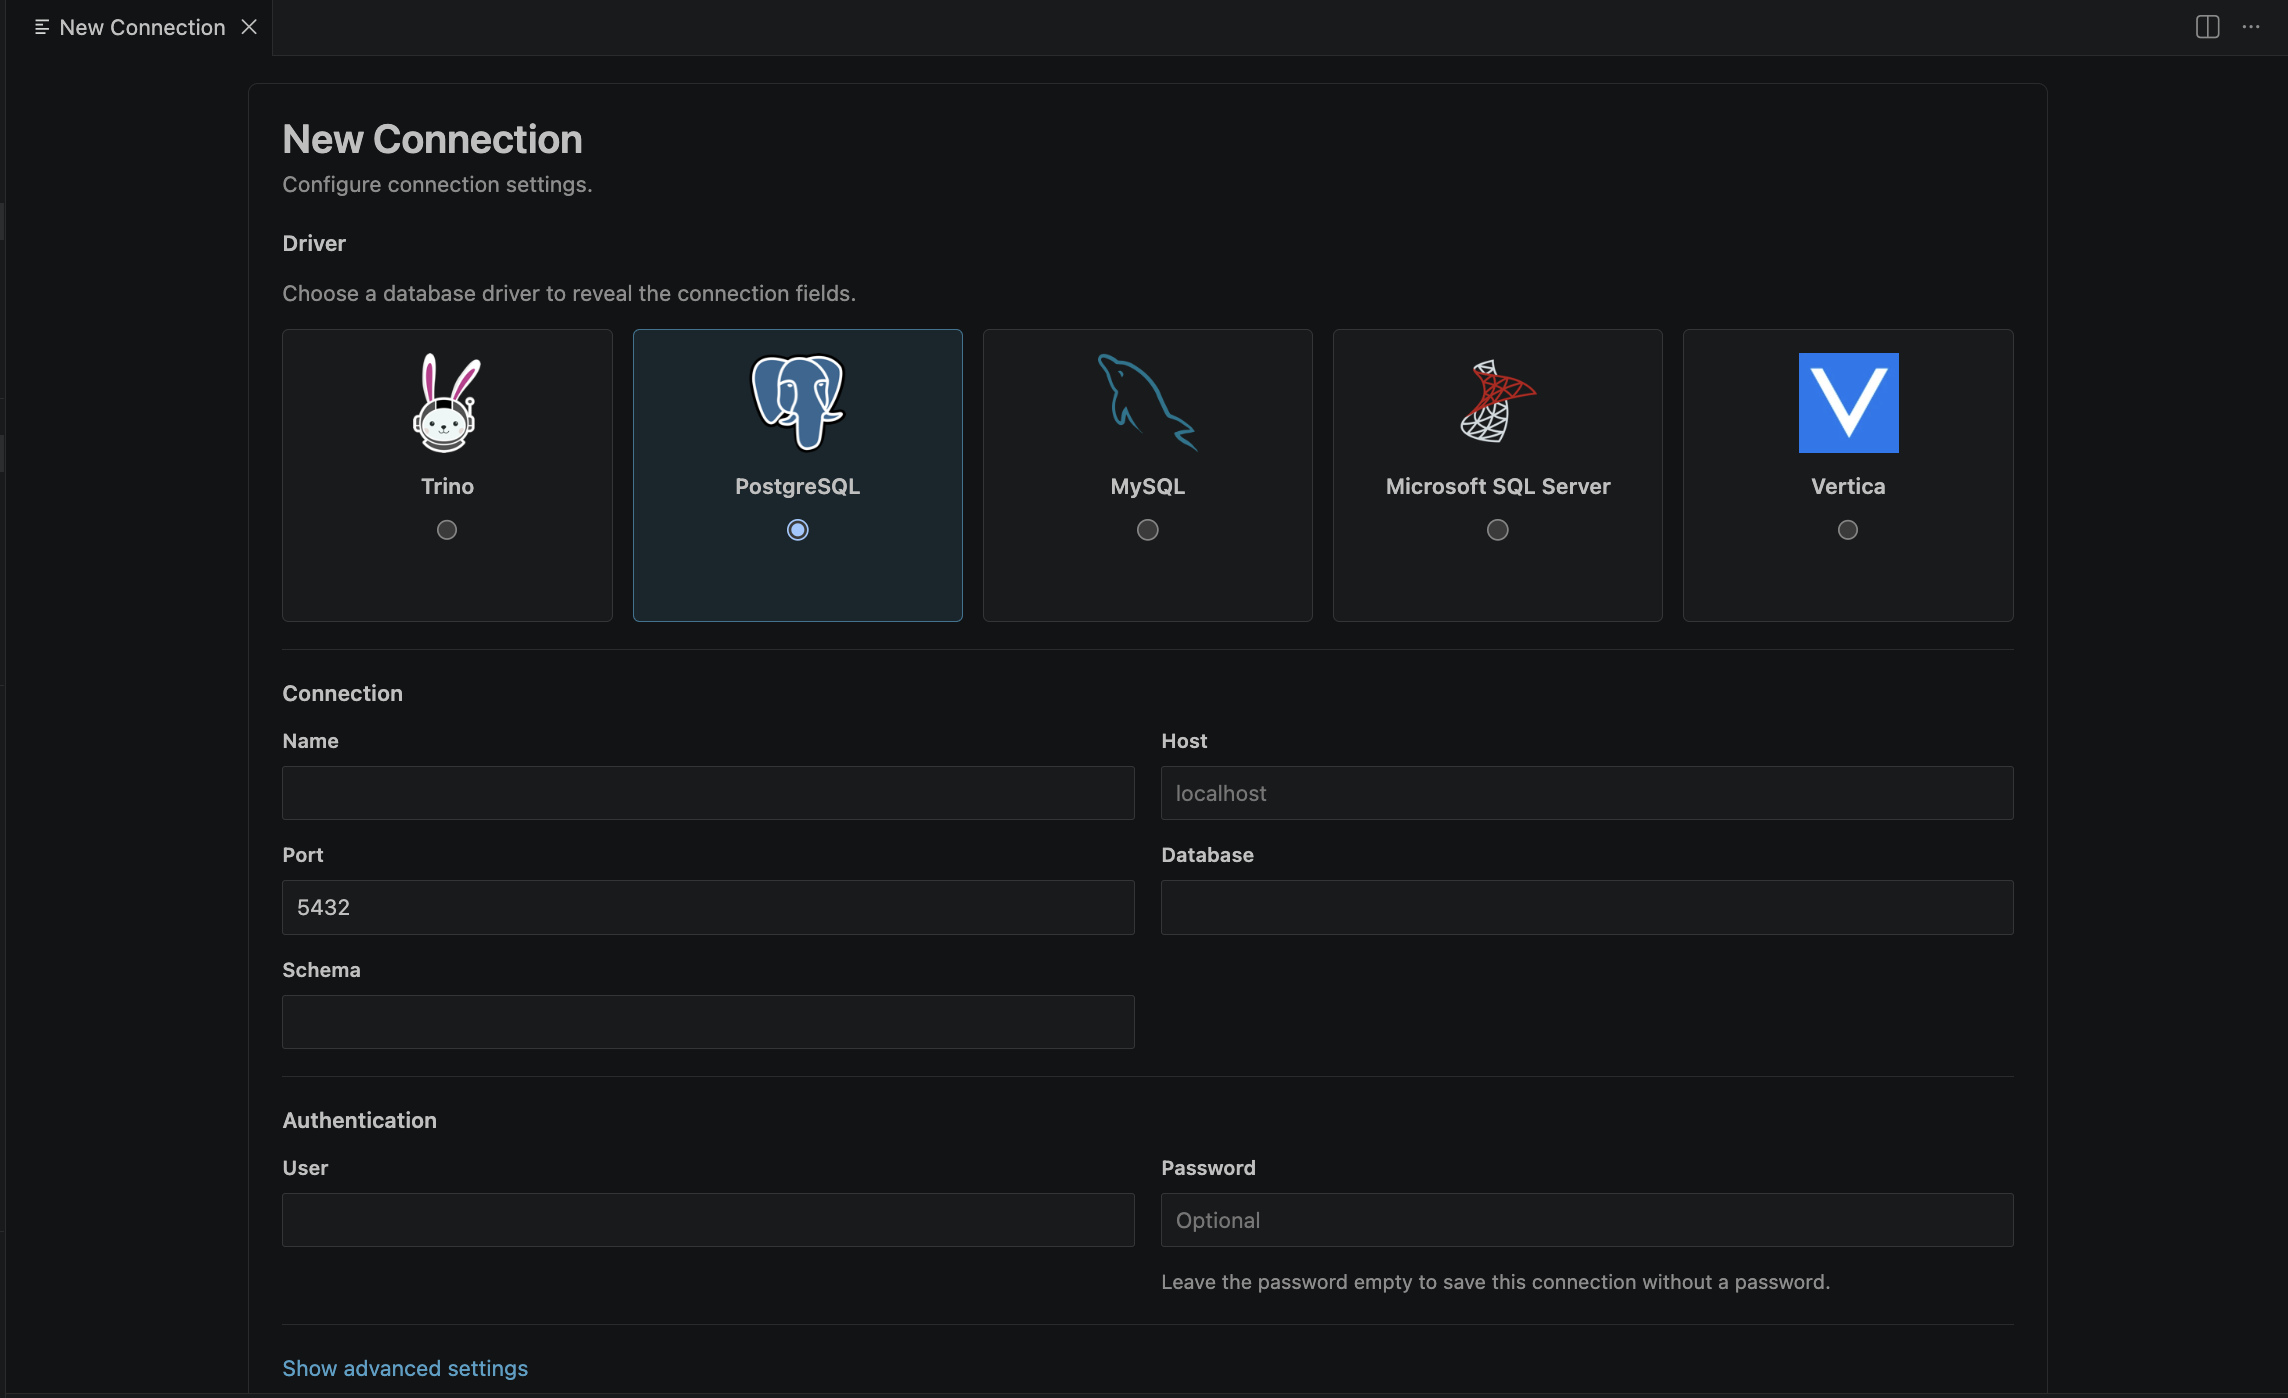
The DBeagle connection form for adding and testing a database connection.
Step 3: Explore your database
After DBeagle connects, the Connections tree populates with the objects it can browse for that driver.
Connection -> Catalog or database -> Schema -> Table or view -> ColumnClick any table or view to run a bounded preview query. This is a fast way to validate that the connection works and that you are looking at the right schema.
Step 4: Run a query
- Open a
.sqlfile, or create one. - Write a query such as:
select *from orderslimit 100;- Press
Cmd+Enteron macOS orCtrl+Enteron Windows and Linux. - The result opens in the
DBeagle Resultspanel.
If you select part of the SQL first, DBeagle runs only the selected text by default.
Step 5: Use parameters when you need reusable SQL
Named $parameters let you keep one query template and swap values before execution:
select *from orderswhere order_date >= $start_date and order_date < $end_date;When DBeagle detects parameters, the Parameters view shows inputs for the current file or selection.
Step 6: Work with the result grid
| Action | How |
|---|---|
| Search rows | Use the search box in the results toolbar |
| Sort a column | Click the sort control in a header |
| Filter a column | Type into that column’s filter input |
| Resize columns | Drag the header resize handle |
| Reorder columns | Drag a column header |
| Copy a selection | Select cells, rows, or columns and copy them |
| Export data | Use the export menu for CSV or JSON |
| Open chart view | Switch from Grid to Chart when the result supports it |
| Detach results | Open the result in its own editor tab |
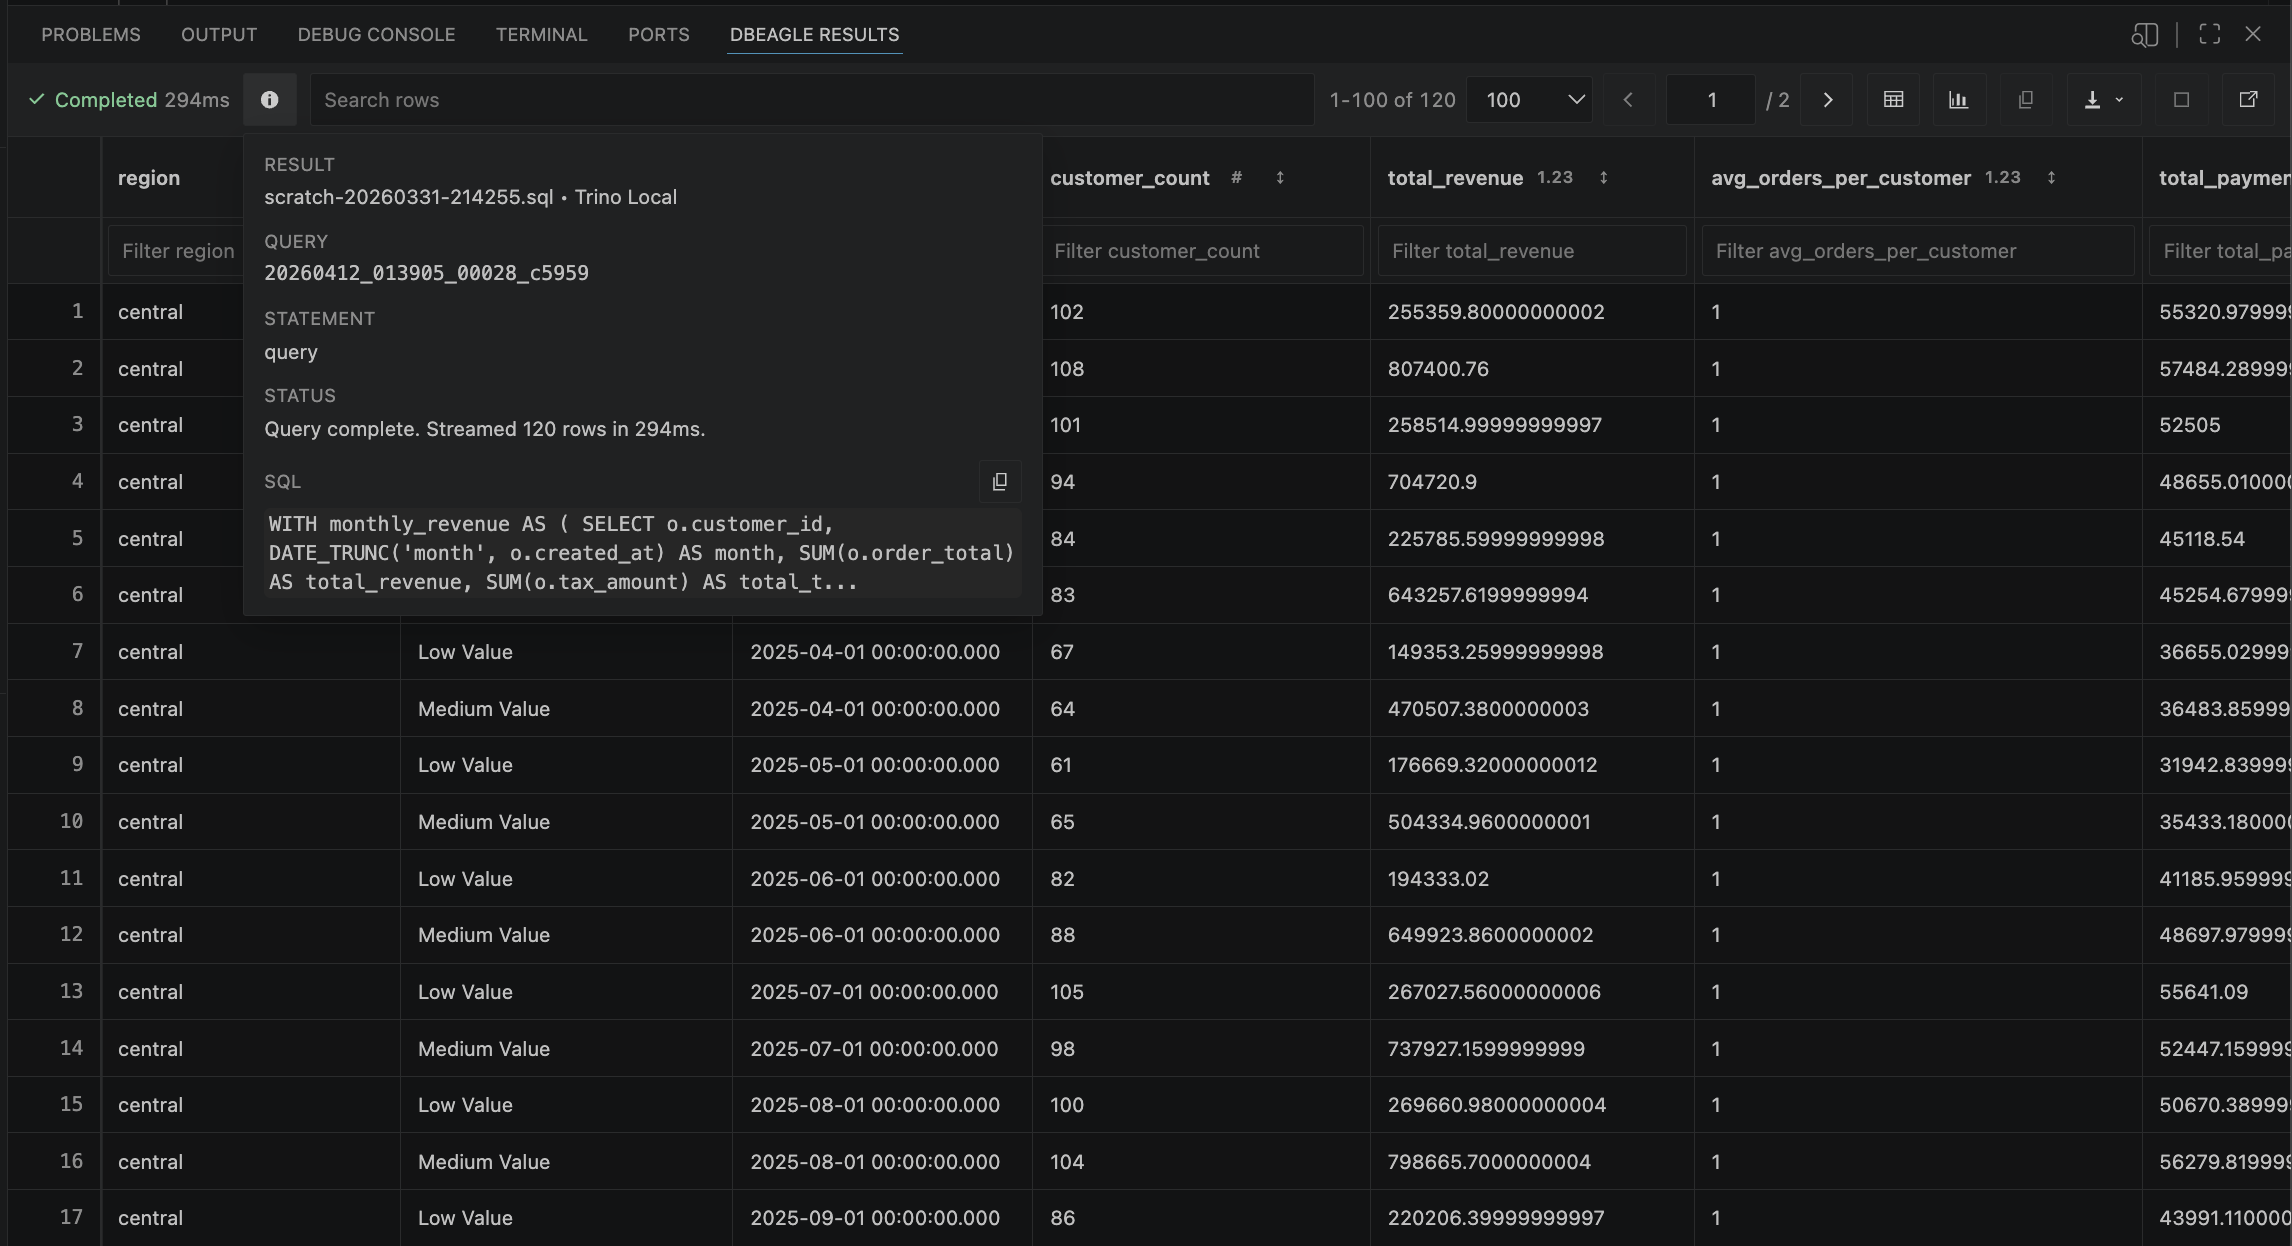
A completed result set in the DBeagle Results panel.
Step 7: Keep the right safety mode on
DBeagle starts with read-only protection enabled. That is the recommended mode for production and shared environments.
If you intentionally need to run writes, use the button in the Connections view header to switch into write mode first. DBeagle will then allow mutating SQL instead of blocking it.